Well what I worked on today anyway. Today I made rod
So I thought I’d write a little tutorial on how easy they were.
First you must choose your fabric. I like color. It makes me happy. So I went with this bright print by Michael Miller. The print will also prevent the neighbors from seeing me in my birthday suit. Believe me when I say I’m doing them a favor. ;)
Once you have chosen your fabric you must wash and dry it.
Then comes the ironing…
You can’t have nicely sewn things without a fabulous iron. I’m serious.
After your fabric has been ironed to perfection you will then measure (measure again), then you’ll… nope, measure one more time and then cut your fabric. This is best achieved I believe with a rotary cutter.
Time to iron again!
I remember playing with this nifty little tool when I was young. If you don't own one, get one! It makes your hem lines look perfect! Just measure and press.
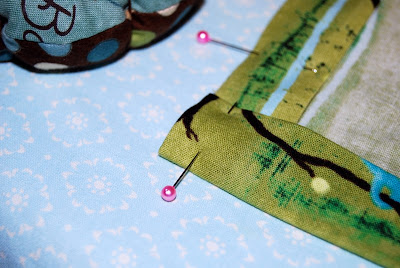
For the side hem you will measure an inch and press. Then you'll fold over that inch and press again so it's doubled.
Once you have the your side hems neat and pressed into place I recommend pinning so everything stays put.
Now repeat the same process for the bottom hem and pin.
Topstitch the sides first, removing pins as you go. A magnetic guide helps to keep the stitches straight. Again, if you don't have one, get one! Do the same for the bottom hem.
The next step is to skip back to your ironing board and fold over and iron the upper edge (1/2 inch). From your measurements you will then determine the amount of fabric you will fold over to create the top edge and rod pocket. Measure, iron and pin. Before I started to sew again I made a guideline for the top stitching of my rod pocket using my husband's electrical tape. I measured from the needle to wear the top of the curtain would hit. My magnet guide doesn't function well on the plastic casing. :/
Proceed to topstich the lower edge.
Once your lower edge is stitched, line up the top edge of your curtain panel to your tape guide and begin to sew the rod pocket.
Slow and steady wins the race and ensures a nice straight stitch. Trim your loose threads and iron once again. Just do it...
Insert the rod into the rod pocket and hang.
One panel finished. One more to go!
(Please ignore the walls. It's an old house and I need to repaint.)
Lastly, a bonus picture of Johnna. She thinks she's going in the hot tub, hence the bathing suit. Not tonight baby girl. Mommy has some sewing to do!


2 comments:
What a fantastic blog post! Even as a seasoned seamstress, these back-to-basics are a welcomed reminder!
I found your blog on the "If you follow me, I'll follow you" thread on the Etsy forums. I'm following you! Here's mine if you are interested: http://henandchick.blogspot.com
Post a Comment